Figma introduced a powerful feature called local variables, which includes the ability to create and use variables for various design properties.
- Consistency: By defining breakpoints as variables, you ensure consistency across your designs. When you need to adjust a breakpoint value, you can update it in one place, and it automatically propagates throughout your design system.
- Efficiency: Variables allow you to set min and max widths for breakpoints.
- Design System Support: If you’re working on a design system, breakpoint variables can be added to your library.
- Brand Theming: If your design system includes multiple brands, variables can support brand-theming by allowing you to define breakpoints specific to each brand.
Getting started is easy
Step 1: Create a New Local Variables Collection
Access local variables by clicking the ‘Local variables’ icon button.
To create a new collection, click the ‘Create collection’ option from the meatball menu.
Step 2: Name Collection Modes to Match Breakpoint Sizes
Add modes to the collection corresponding to breakpoint sizes:
Mobile: 320 – 640px (Fluid)
Tablet: 640-960px (Fluid)
Large: 960 – 1440px Step 3: Add
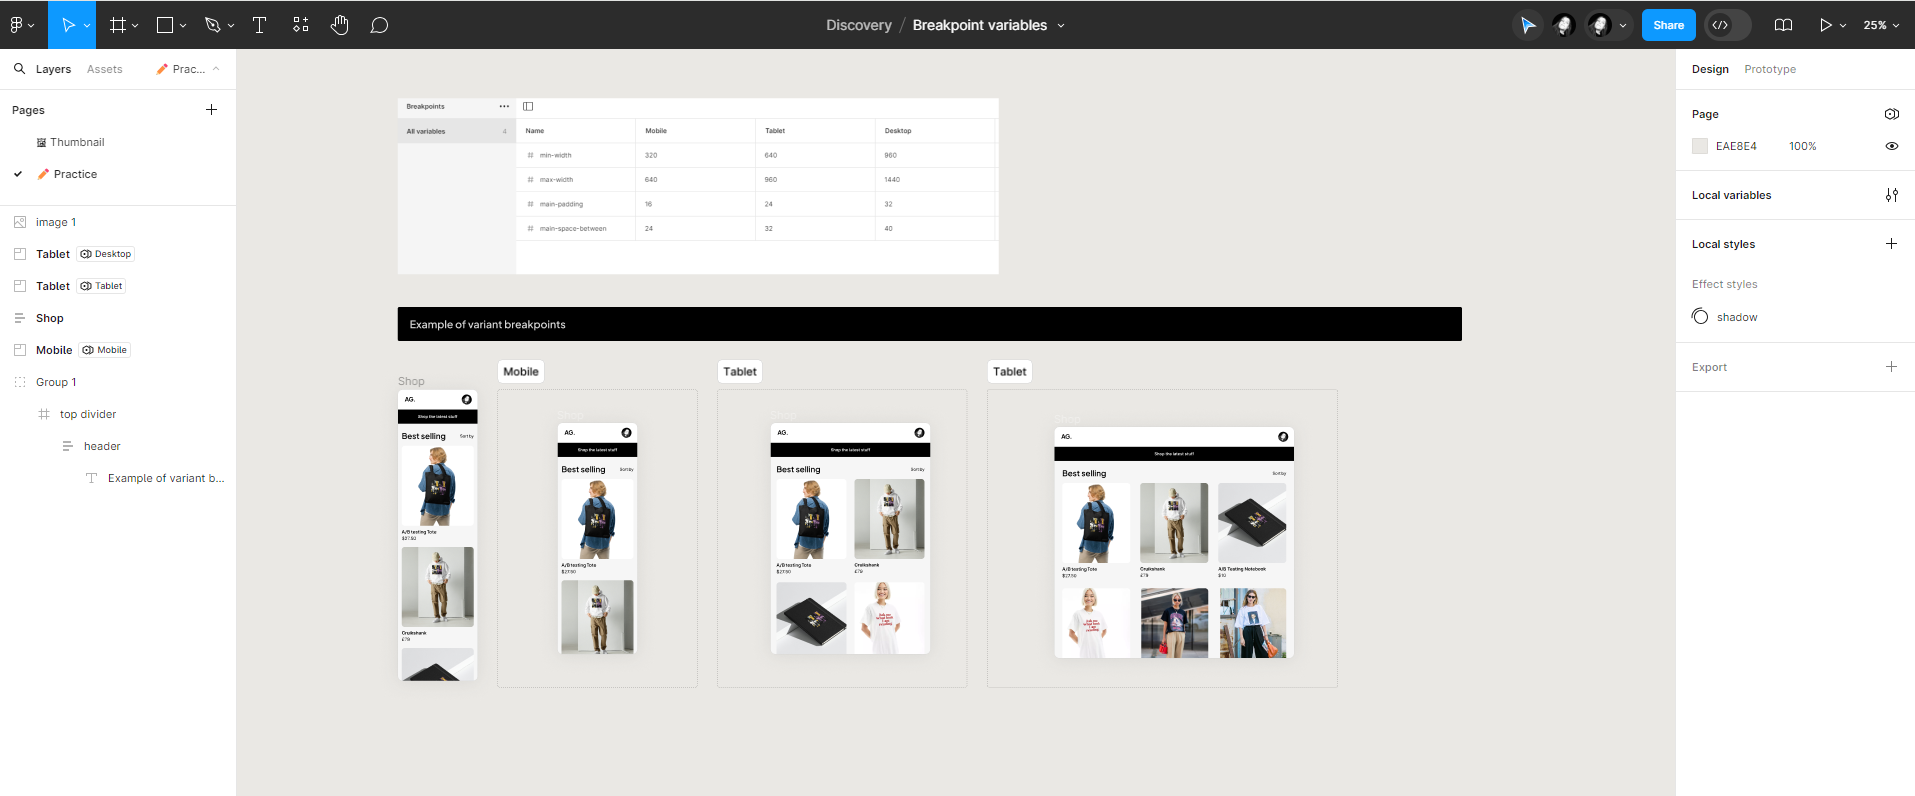
Number Variables and Values
Create number variables for each breakpoint specification:
Min-width
Max-width
Main-padding
Main-space-between
Assign values to each variable based on your Design System or product guidelines.
Step 4: Apply Breakpoint Variables to Grids
This step involves integrating variables into grid layouts or specific viewport representations:
- Set variables for the min and max widths of the frame.
- Add a variable for the frame’s margin.
- Define the mode of the frame based on breakpoints.
Step 5: Apply Variables to UI Components
Similar to Step 4, apply variables to UI components, focusing on those with full-bleed application:
- Set variables for min and max widths of the component.
- Assign variables for margin, padding, and gap.
- Test the UI component in various grid or viewport scenarios.
Conclusion
Variables offer significant flexibility and efficiency in design processes. By leveraging them effectively, you can streamline design iterations and enhance collaboration between designers and developers.